In this article, you’ll learn about the Viewport and Snapping settings in Tabletop Creator. These settings allow you to customize your workspace for optimal design efficiency. The Viewport settings help you manage how you view and navigate your project, while Snapping settings assist in aligning elements precisely on your canvas. Mastering these tools will streamline your workflow and improve the accuracy of your game designs.
Viewport settings
In this section, you can manage the visibility of Bleeding and Grid within the blueprint. To access these options, click on the Viewport dropdown to reveal the settings.
- Shape Background: Customize the color of the background surrounding shapes in your blueprint.
- Preview Bleeding: Toggle this option to access and customize the following settings: Show Cut Lines, Cut Lines Color, Show Safe Zone, Safe Zone Color, Show Bleed Zone, Bleed Zone Color. Read more about bleeding in the Bleeding & Safety Zone article.
- Show Grid: Toggle this option to access and customize these settings: Grid Color, Grid Manual Mode, Grid Sections X, Grid Sections Y.
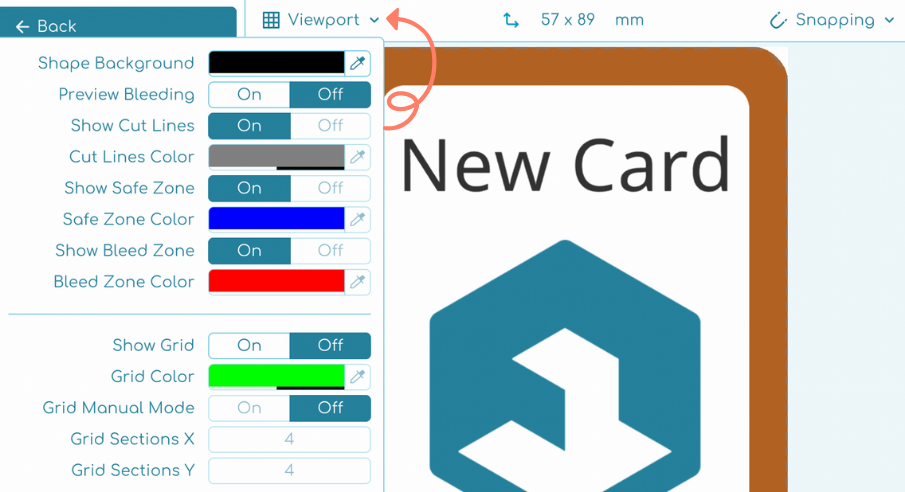
When these features are enabled, their corresponding visuals will appear as illustrated below:

Grid settings
In the grid settings (first screenshot), to employ the grid effectively, you can either divide the blueprint into sections or utilize the grid manual mode by specifying the distance between lines of the grid for each axis.
In manual mode, choose to start the lines from the center (as demonstrated in the second screenshot) or from the top-left corner of the blueprint (as illustrated in the third case). Optionally, the offset can be used to adjust the starting point of the lines.

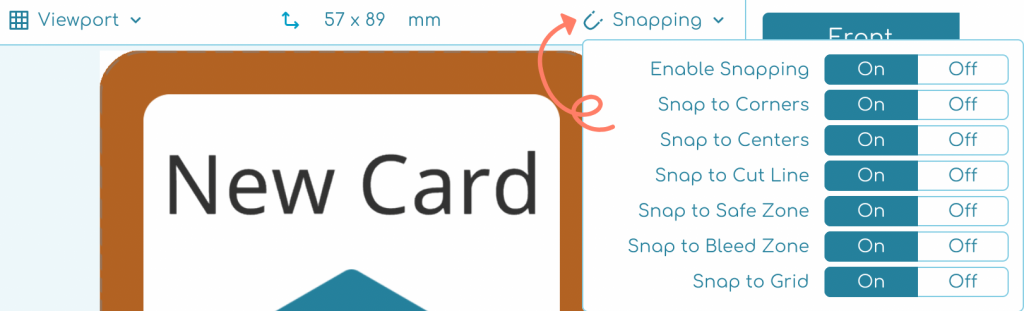
Snapping settings
To customize the snapping behavior when moving panels or layers within the viewport, click on the Snapping dropdown settings.
Within this menu, once you have activated Enable Snapping, you can toggle various snapping options according to your workflow needs. These options include: Snap to Corners, Snap to Centers, Snap to Cut Line, Snap to Safe Zone, Snap to Bleed Zone and Snap to Grid.
Activating these settings will ensure the precise alignment of your panels or layers, thus enhancing your design process.
Quick tips
ℹ️ With Snap to Corners and Snap to Centers activated, you can align your panels to the corresponding corners or centers of other panels within the blueprint.
ℹ️ To snap to specific areas such as the Safe Zone, Bleeding Zone or Grid, you must first make their gizmos visible. This is achieved by enabling their visibility in the Viewport settings.