
Experience an intuitive visual approach to managing your groups and panels!
In this article, you will find the following themes:
Groups & Panels main screen
The main screen offers a variety of options for managing groups and panels:
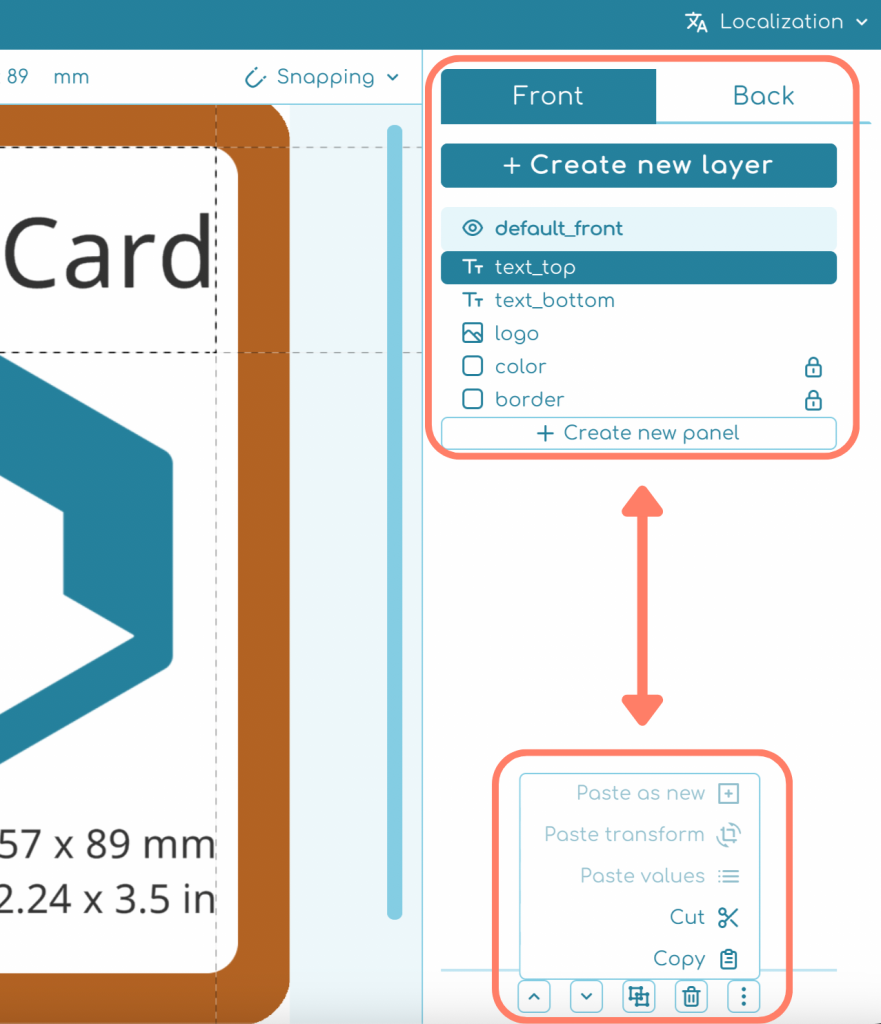
↑ At the top of the screen:
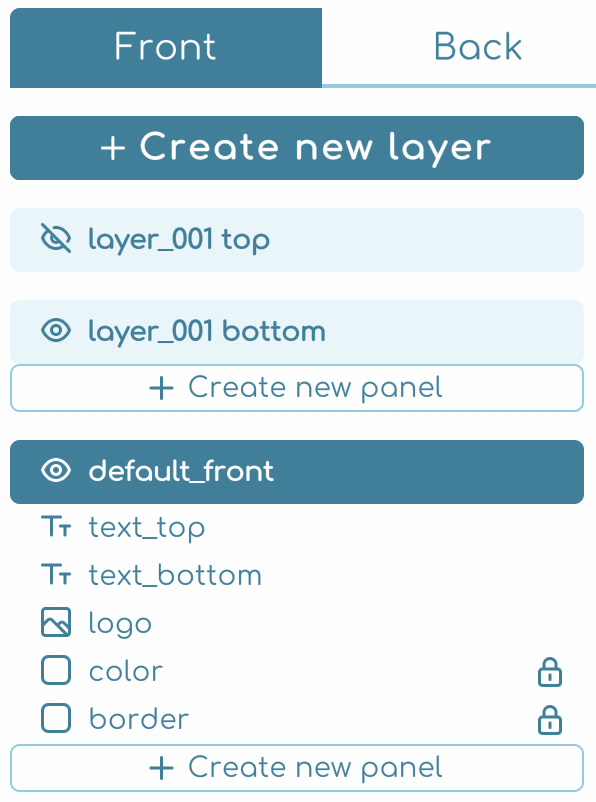
- Toggle between the Front and Back sides of your item.
- Create a new group with the + Create new group button.
- Add a new panel to a group using the + Create new panel button.
↓ At the bottom of the screen:
- Sort: Reorder the selected group/panel upwards or downwards as needed. Depending on the order, the panel will be positioned on top of or beneath another in the blueprint..
- Duplicate: The selected group/panel.
- Delete: The selected group/panel.
- More options: copy, cut, paste groups and panels, within the same blueprint or across different ones:
| Action Performed | Target Element | Interface Option | Outcome Description |
|---|---|---|---|
| Copy | Panel/Group | Paste as New | A new panel/group is created above the selected one. |
| Cut | Panel/Group | Paste as New | The cut panel/group is repositioned above the selected one. |
| Copy/Cut | Panel | Paste Transform | The transformation attributes of the copied panel are transferred to the selected one. |
| Copy/Cut | Panel | Paste Values | The properties of the copied panel are applied to the selected panel, except for its transformation attributes |
Groups management
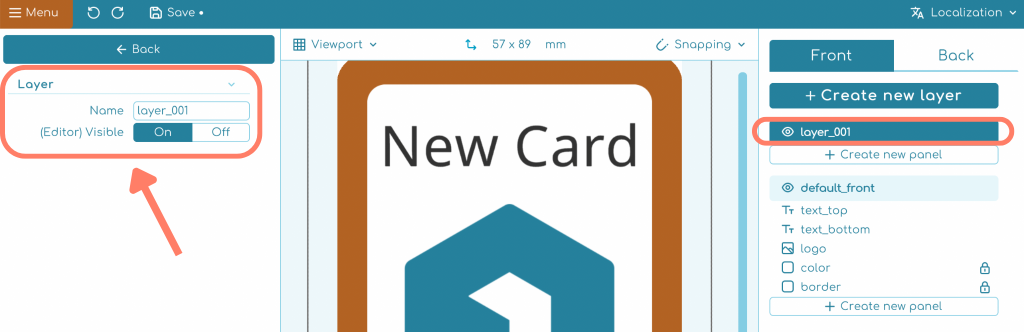
Groups are there to help you organize your blueprint’s panels. Their use is completely optional; opt for a single group if it suits your needs. Here are their properties:
- Name: For better organization, rename your group according to your project requirements.
- (Editor) Visible: Toggle On or Off to make your group visible.
Panels management
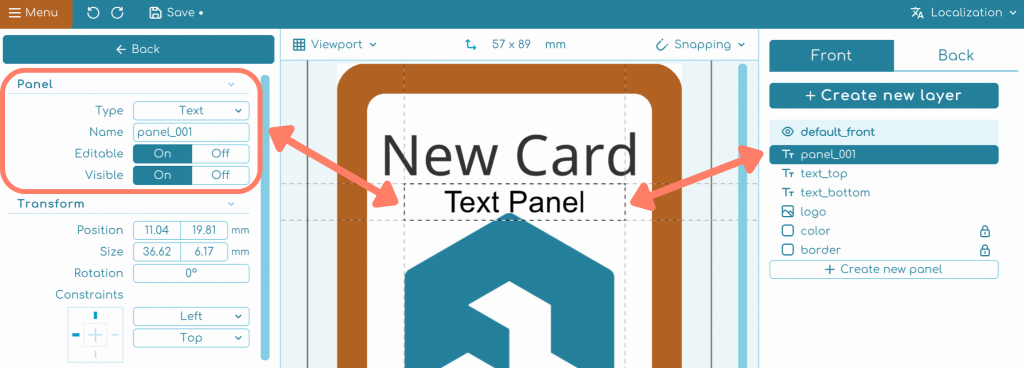
Panels are your canvas for bringing various elements such as images, icons, and text to life within your item blueprints. Here are their properties:
- Type: Create Text Panels, Image Panels, Procedural Panels, Icon Panels, ScanCode Panels, Linked Panels, as detailed in the Panel Types article.
- Name: Rename your panel for better organization of your project.
- Editable: Enable or disable panel editing.
- Visible: Show or hide the panel.
Transform properties
Move, resize and rotate panels using the transform section on the left settings or with your mouse.
- Position: Sets the X and Y coordinates of the panel on the blueprint, in millimeters.
- Size: Determines the width and height of the panel, in millimeters.
- Rotation: Adjusts the panel’s rotation angle in degrees.
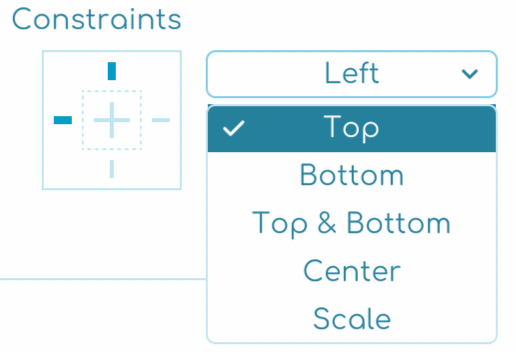
- Constraints: Defines how the panel scales and aligns within the blueprint.
Note: Remember, the origin point for all panels is the top-left corner of the blueprint, and this aligns with the panel’s bounding box. Positioning a panel at 0,0 aligns it with the top-left of the blueprint, anchoring it to the top-left corner of its bounding box (considering rotation).
Constraint settings
Effortlessly move, resize, and rotate all panels within a group or blueprint simultaneously! Each panel will adjust according to its transform constraint property.
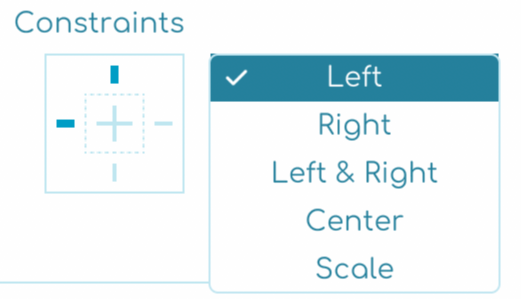
Available constraint options for each axis include:
- Left / Right / Top / Bottom: Panels maintain a constant distance from the selected edge of the group/blueprint.
- Left & Right / Top & Bottom: Panels stretch to maintain distance from both sides of the axis, adjusting size accordingly.
- Center: Panels stay equidistant from the group/blueprint’s center.
- Scale: Panels resize proportionally within the group/blueprint.
| Horizontal Axis | Vertical Axis |
 |  |
Quick tips
ℹ️ New groups/panels in the list are displayed above the bottom ones.
ℹ️ Toggle groups/panels visibility in the blueprint editor by clicking the eye 👁️ icon beside the panel/group.
ℹ️ Set a panel to not be editable with the lock 🔒 icon beside the panel.
Note: Discover more panel transformation techniques in the shortcuts article.