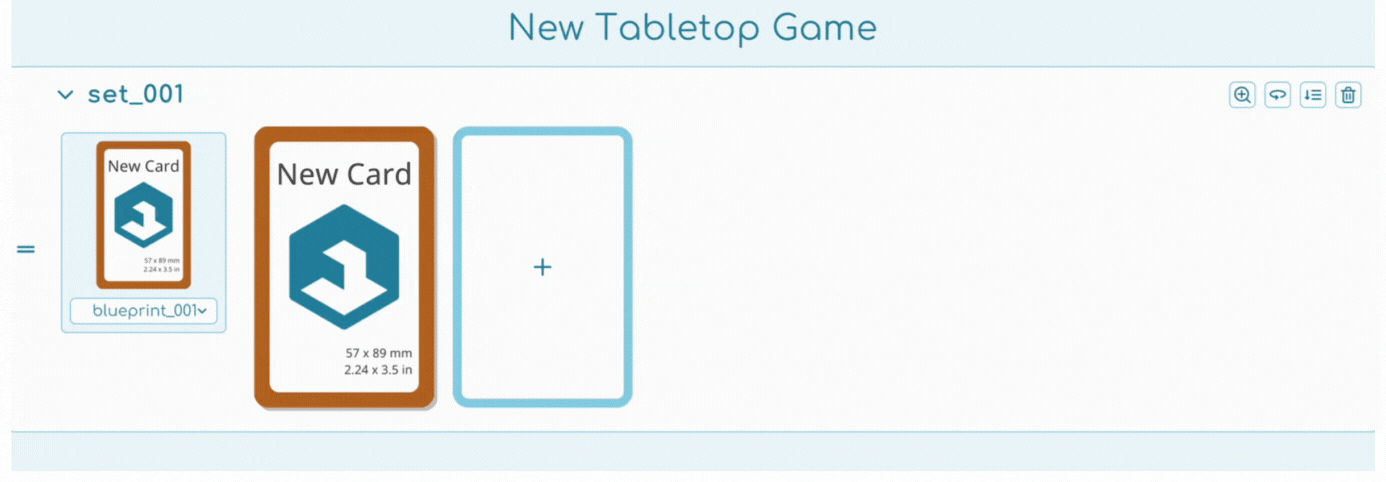
Items are the components of your tabletop game and should be organized within sets.
In this article, you will learn about:
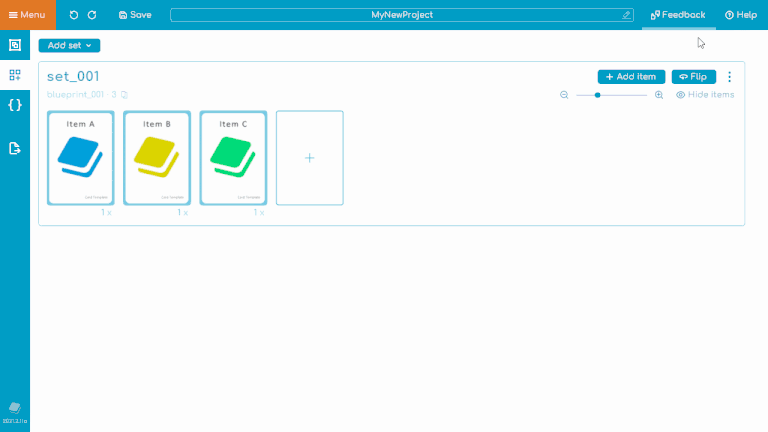
Add new items
To add new items to your set, click on the “plus” icon located next to the existing items within your set, or use the keyboard shortcut CTRL+N (for Windows) or CMD+N (for Mac). This allows you to quickly expand your set with new elements.
Item context menu
To access the context menu of an item, right-click on the item. The menu provides the following options:
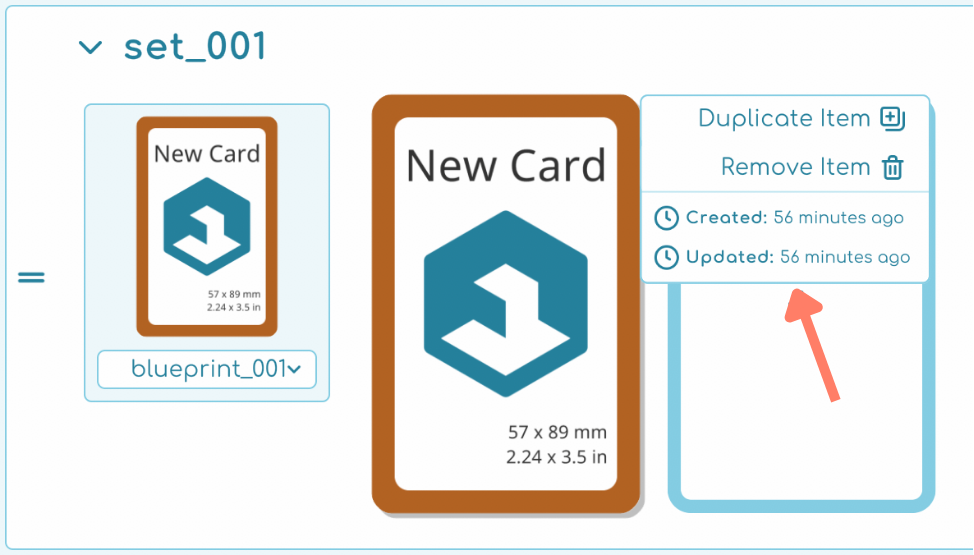
- Duplicate Item: Creates a copy of the selected item.
- Remove Item: Deletes the selected item from your set.
- Created: Shows when the item was first created.
- Updated: Displays the last time the item was modified.
Item quantity
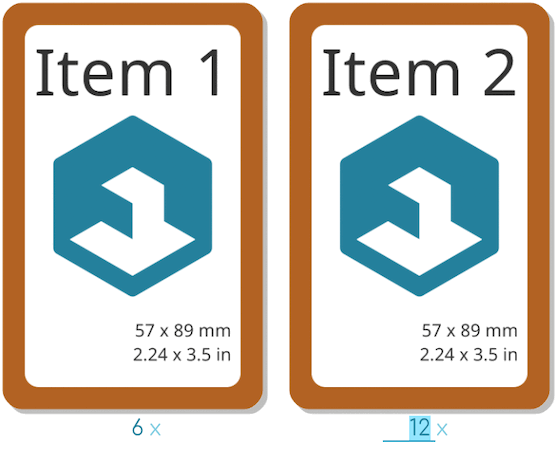
Adjust the item quantity to define how many identical items you need in your game.
Note: To enable this feature, go to Settings, turn ON the “Show set items amount inputs” option, and save.
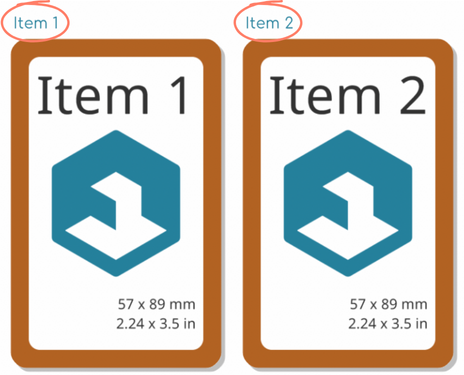
Identifier labels
If you have designated an identifier within your blueprint, its value will display at the top of each item, making them easier to identify. This is especially useful when updating items from data imports, like Excel or CSV.
Note: To enable this feature, go to Settings, turn ON the “Show set items identifier labels” option, and save.


Drag & drop items
You can drag and drop items to:
- Manually sort items within the set.
- Move items between sets (consistency with panel names between blueprints is recommended).
- Delete an item by dragging it off the window.
Item editor
The item editor provides a powerful yet intuitive interface for customizing individual items in your project. With easy-to-use controls, it allows you to adjust text, appearance, and other properties of each item, enhancing your ability to create unique components efficiently.
Opening and closing the item editor
Open: Click on an item to enter the editor.
Close: Right-click on the item to exit the editor.
Navigate: Use the previous/next buttons at the bottom of the editor or keyboard shortcuts to switch between items.
Zooming and panning
Zoom: Use the mouse wheel to zoom in and out on the item preview.
Pan: Adjust your view using scrollbars, the middle mouse button, or by clicking and dragging in areas without panel controls.
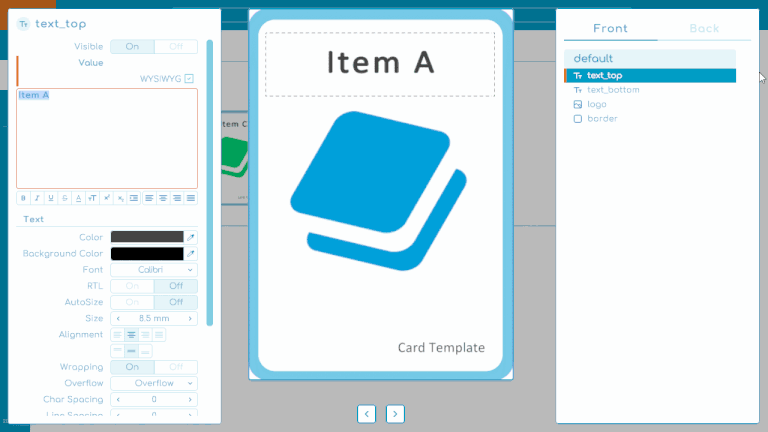
Editing items
When you edit an item, you override the blueprint data (text, images, etc.) to make each item unique. All item editor panel inspectors resemble those in the blueprint editor. However, you can’t rename or edit the panel’s transform (position, size, rotation); you can only override their properties or visibility.
The editor allows you to override blueprint properties like text, colors, and styles, making each item distinct. In the panel inspector, you can adjust visibility, values, text formatting, colors, font, and much more:
- Visibility: Toggle panels on or off.
- Text and Formatting: Customize the text, adjust font size, style, alignment, and colors.
- Layout Controls: Manage wrapping, overflow, and spacing options to fine-tune the text appearance.
Note: you cannot change the position, size, or rotation of panels here, these remain tied to the blueprint settings.
Remove item overrides


Orange lines next to overridden properties indicate changes. Click the orange buttons to remove overrides and reset the property to its blueprint default. Bold text shows which properties have been modified.
Copying and pasting overrides

Use the Copy and Paste buttons at the bottom of the inspector to duplicate overridden settings between items, making it easier to maintain consistency or replicate complex customizations.