If you’ve ever wanted to design your own version of Monopoly—or any property-based board game—Tabletop Creator gives you all the tools to bring your custom Monopoly board game to life. In this guide, we won’t walk you through every step, but instead, show you the framework: how the game is structured, how each piece is built, and how everything fits together using layers, panels, and blueprints.
Panels, Layers & Blueprints in Tabletop Creator
Before diving into the components, it’s important to understand how Tabletop Creator works under the hood. Everything you build—whether it’s a card, board tile, or token—is made up of smaller pieces arranged in a clear structure. This section gives you the vocabulary and tools to start designing with intention.
Every component in Tabletop Creator is created using three essential elements:
- Panels: These are the individual elements you place on your blueprint—text boxes, images, colored shapes, and borders.
- Layers: Panels live inside layers. Layers help organize your content so you can move or edit whole sections together.
- Blueprints: Each blueprint defines the structure of one component, like a card, token, or game board. It’s your editable template.
Think of it like building a 3 tier sandwich: panels are the ingredients, layers are the…layers, and the blueprint is the delicious sub.
Designing the Board
The board is the centerpiece of any Monopoly-style game. In Tabletop Creator, you’ll build it layer by layer, starting from the background and adding structural elements like corners and property spaces.
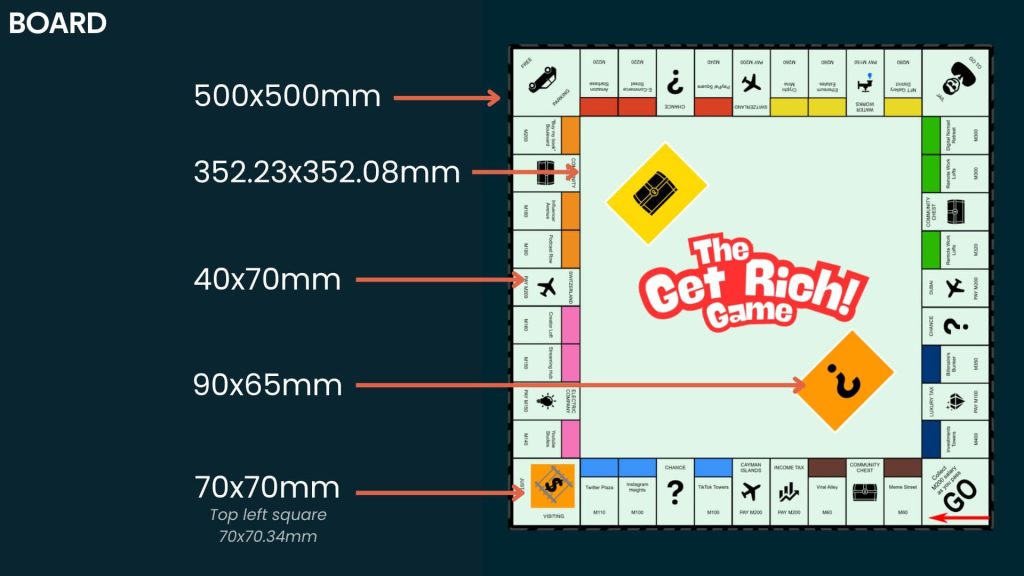
The foundation of the game is a Big Board blueprint, which we set to 500 x 500 mm. This gives you a large canvas to work with and plenty of space to design a traditional square path.
The board is organized using multiple layers:
- One for the background, logo and inner outline.
- One for the Chance and Community Square card space.
- One for the corners.
- Additional layers for each section of the board, including property tiles, event zones, and corners
Corner Positions
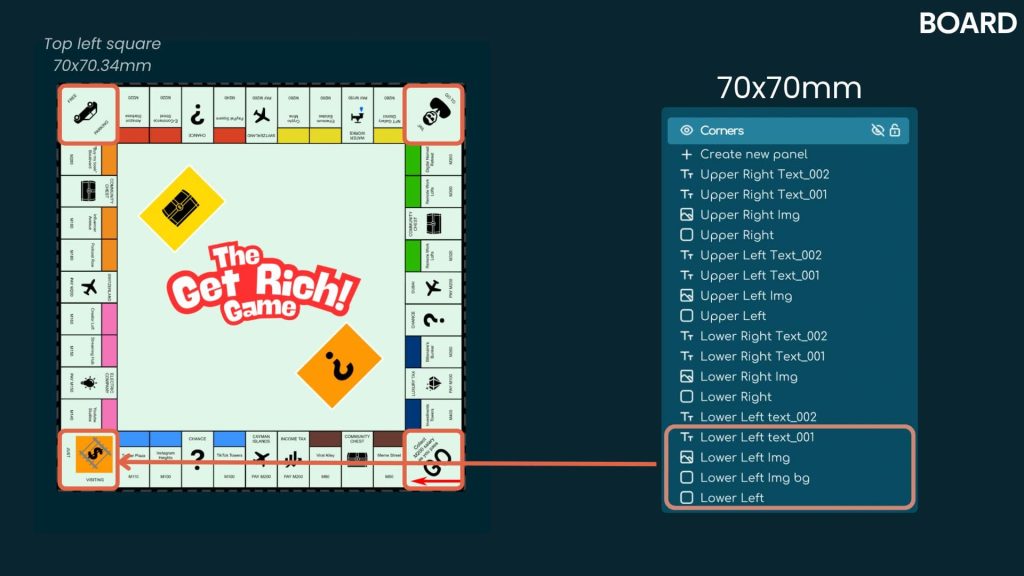
Each corner uses a 70 x 70 mm square and is made up of:
- A procedural outline panel
- A centered icon image
- Two text panels, typically for the space’s name and its effect or description
These are positioned on the upper-left, upper-right, bottom-right, and bottom-left corners of the board.
Property spaces
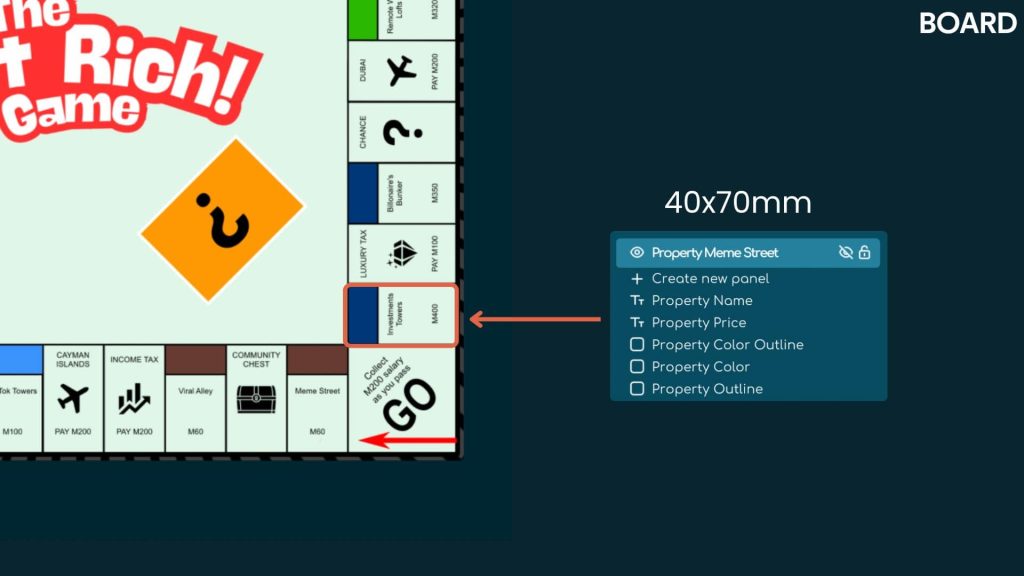
Property spaces make up the bulk of the outer path. Once you create the first tile, you can duplicate and tweak them to populate the entire board with them.
Property spaces are designed using a clean modular layout:
- A base rectangle (40 x 70 mm) with an outline
- A top bar (40 x 20 mm) in a distinct color group (brown, blue, etc.)
- A name and price added as text panels
Utilities / Taxes and Chance / Community Chest Spaces
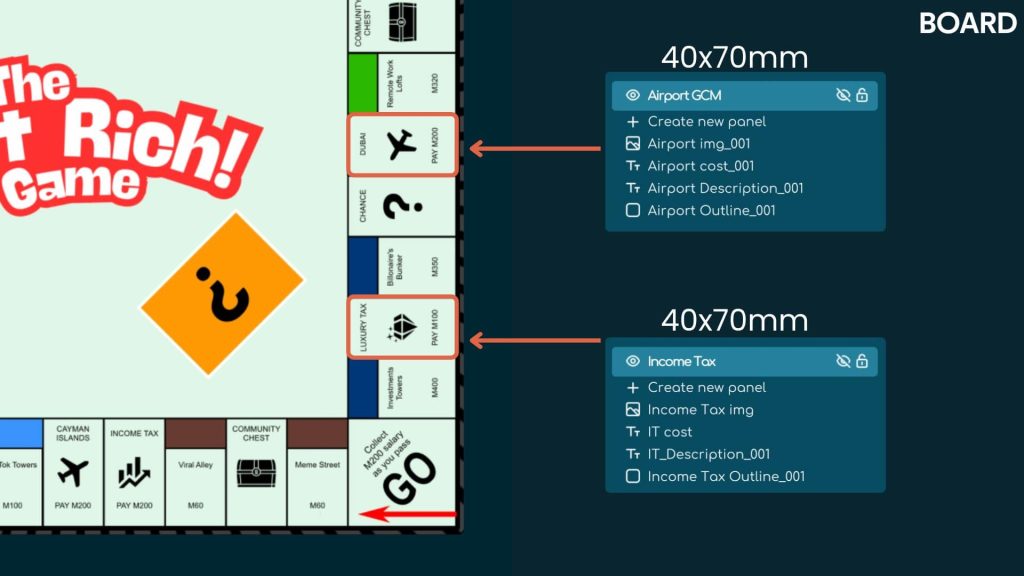
This squares follow a similar structure, but the basis of them is:
- A base rectangle (40 x 70 mm) with an outline
- A centre (image 35x35mm)
- A name and price/tax added as text panels
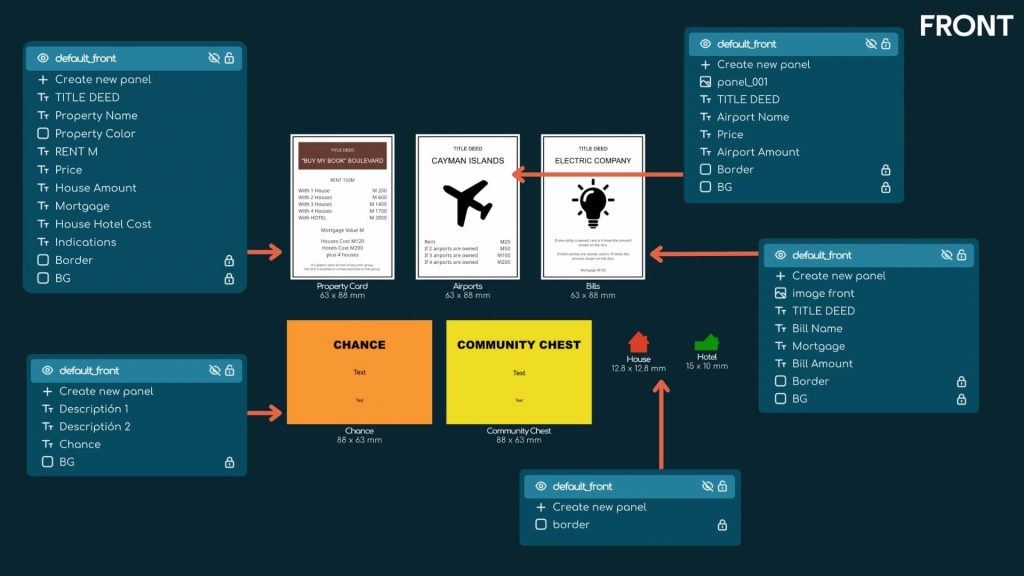
Designing the “Monopoly” Cards
Whether it’s collecting rent, drawing surprise effects, or managing utilities, cards give players critical information at a glance. In Tabletop Creatorv you can keep your cards organized and easy to update.
Cards in this project use the Euro Poker Card blueprint, which measures 63 x 86 mm.
Property Cards
These cards mirror their counterparts on the board and are designed for clarity and function. By structuring them consistently, you make them both readable and editable.
Each card includes:
- A bold title at the top (with a color bar matching the board tile)
- Rent prices, upgrade costs, and mortgage values
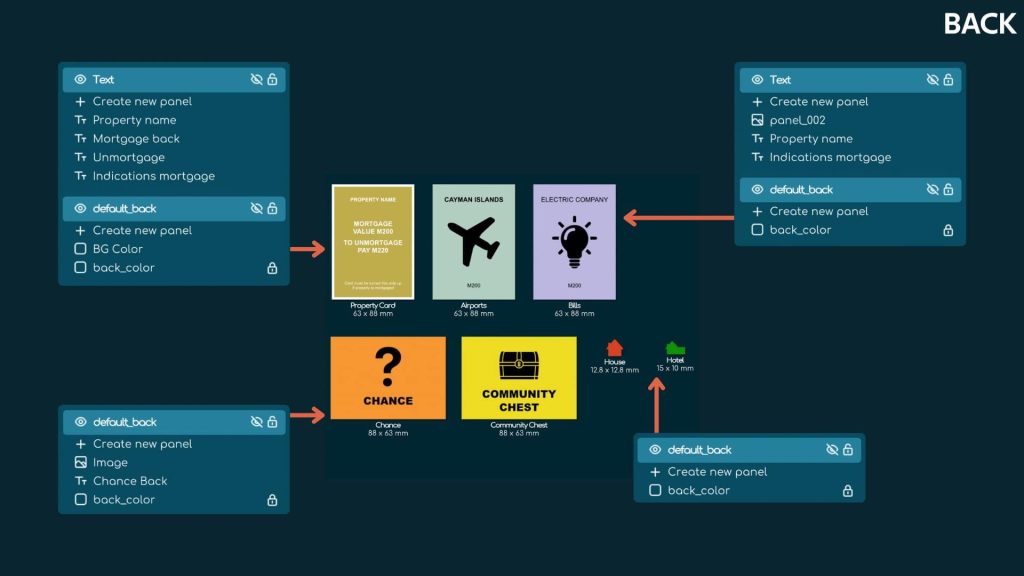
- A procedural outline and background for clean structure
- A rear side with supporting information (mortgage, mechanics, etc.)
Once the layout is complete, you can duplicate it to build your full card deck.
Event Cards
These cards differ from the others in that they are way less complex and are made in landscape ( 63 x 86 mm ).
Each card features:
- A title section
- A short description
- A back panel with a central icon and it’s titleç
Utility Cards
Utility cards are minimal and functional. They don’t need complex information—just a rent mechanic and an identity marker. In design terms, they are some of the simplest, which makes them easy to create and modify.
Utility cards typically include:
- A bold icon (e.g. a lightbulb)
- A short rule or rent mechanic
- Background panels colored differently to help distinguish them from other cards
Tokens: Custom Shapes for Houses & Hotels
Tokens are the tactile cherry on top of your design. Creating your own shapes—rather than using generic pieces—gives your game a professional, personal feel. Tabletop Creator makes it easy to use custom vector masks for this.
Tokens are built using Token blueprints, and you can define custom shapes by uploading black PNG masks.
- Houses: 12.8 x 12.8 mm
- Hotels: 10 x 15 mm
Each uses:
- A colored background panel (e.g. red for houses, green for hotels)
- A shape mask selected in the Shape dropdown menu
This simple system allows for highly customizable, easily scalable game pieces.
Grouping Your Components: Using Sets
Once your components are designed, you’ll need to create sets form. You’ll need to right click on your blueprints in the blueprint manager and select “create set”.
With sets you can edit your blueprint without changing the design or positioning of your layers and pannels. For the property cards all we did was change some numbers, the propery name and the color of the properties.
Using a boardgame design software to make your board game
By understanding how Tabletop Creator uses blueprints, layers, and panels, you unlock the ability to design board games with real structure and polish. Whether you’re reimagining Monopoly or designing a completely new experience, this system gives you total control over every component. Once your structure is done, you can focus entirely on creative writing, artwork, and playtesting—without having to reformat anything.